Mastering Video Editing Tips And Tricks For Beginners
Whether you`re a budding filmmaker, a vlogger, or someone who wants to create memorable videos for family and friends, Wondershare’s Filmora is a fantastic tool to bring your creative vision to life.
Welcome to the world of video editing! Where minute task can take up to ample amount of time in past. The latest technology can now make that happen in mere seconds.
Whether you`re a budding filmmaker, a vlogger, or someone who wants to create memorable videos for family and friends, Wondershare’s Filmora is a fantastic tool to bring your creative vision to life.
This comprehensive guide will walk you through the basics of getting started, including essential editing techniques, transitions, and effects. By the end of this blog, you`ll have a solid foundation to create polished and professional-looking videos.
Getting Started
Installation and Setup
Before diving into the editing process, you`ll need to install Filmora on your computer. Follow these steps to get started:
1. Download and Install:
Visit their website and download the latest version. Follow the on-screen instructions to install the software on your computer.
2. Launch Filmora:
Once installed, open the app. You`ll be greeted with a clean and intuitive interface designed for ease of use.
3. Create a New Project:
Click on "New Project" to start a new editing project. Set your project settings, such as aspect ratio and resolution, according to your needs.
Importing Media
Before you can start editing, you`ll need to import your media files into Filmora. Here`s how:
1. Import Media Files:
Click on the "Import" button in the media library section and select the files you want to use in your project. You can import videos, photos, and audio files.
2. Organize Your Media:
Organize your media files in the library for easy access. You can create folders and subfolders to keep everything neatly arranged.
Basic Editing Techniques
Timeline and Tracks
Filmora uses a timeline-based interface for editing. The timeline is where you`ll arrange and edit your clips. Understanding the timeline and tracks is crucial for effective editing.
1. Add Clips to the Timeline:
Drag and drop your media files from the media library to the timeline. You can place video clips, audio tracks, and images on different tracks.
2. Trim and Cut Clips:
Use the trimming tool to remove unwanted portions of your clips. Position the play head where you want to make a cut and use the scissors icon to split the clip. Delete the unwanted sections by selecting and pressing the delete key.
3. Arrange Clips:
Arrange your clips in the desired order by dragging and dropping them on the timeline. You can also move clips around to fine-tune the sequence of your video.
Transitions
Transitions are essential for smooth and seamless changes between clips. Filmora offers a wide variety of transition effects to choose from.
1. Add Transitions:
Go to the "Transitions" tab and browse through the available options. Drag and drop the desired transition between two clips on the timeline.
2. Customize Transitions:
Double-click on the transition to customize its duration and other settings. Adjust the transition length by dragging its edges on the timeline.
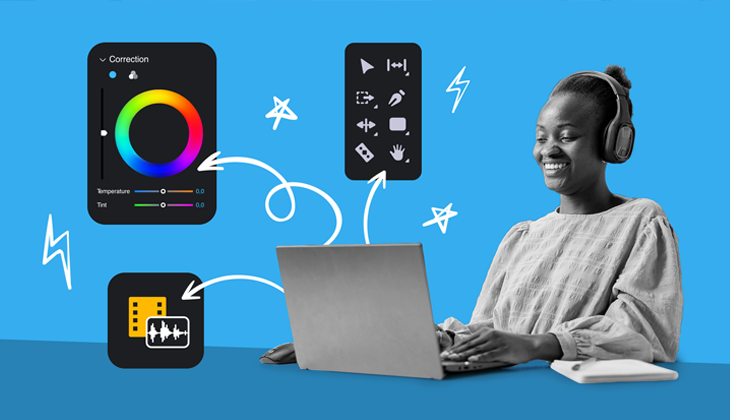
Effects
Adding effects can enhance the visual appeal of your video. Filmora provides a range of effects to choose from, including filters, overlays, and motion elements.
1. Add Filters:
Navigate to the "Effects" tab and explore the filter options. Drag and drop the filter onto your clip on the timeline. Adjust the intensity and duration of the filter as needed.
2. Use Overlays:
Overlays are graphical elements that can be added to your video. Browse the "Overlays" tab and select the one that suits your style. Drag and drop it onto the timeline.
3. Apply Motion Elements:
Motion elements add dynamic visuals to your video. Explore the "Elements" tab and choose from various options. Drag and drop the element onto the timeline and adjust its position and duration.
Audio Editing
Good audio is crucial for a professional-looking video. The tools to edit and enhance your audio tracks.
1. Adjust Audio Levels:
Click on the audio clip in the timeline available at wondershare to reveal the audio settings. Adjust the volume by dragging the volume slider. You can also fade in or fade out audio by dragging the fade handles.
2. Add Background Music:
Import background music into your project and place it on the audio track. Adjust the volume and position of the music to complement your video.
3. Use Audio Effects:
Explore the "Audio" tab for various audio effects. Apply effects like equalizer, reverb, and noise removal to enhance the quality of your audio.
Advanced Editing Techniques
Keyframing
Keyframing allows you to create animations and dynamic effects by setting key points for parameters over time.
1. Add Keyframes:
Select the clip you want to animate and click on the "Animation" button. Add keyframes at different points on the timeline and adjust the parameters (e.g., position, scale, rotation) for each keyframe.
2. Smooth Transitions:
Use easing options to create smooth transitions between keyframes. Experiment with different easing settings to achieve the desired effect.
Green Screen (Chroma Key)
The green screen effect lets you replace a solid color background with an image or video of your choice.
1. Apply Green Screen Effect:
Import a green screen clip and place it on the timeline. Go to the "Effects" tab, select "Chroma Key," and apply it to the clip.
2. Adjust Settings:
Use the chroma key settings to remove the green background. Fine-tune the settings to achieve a clean and seamless composite.
Speed Control
Adjusting the speed of your clips can add dramatic effect or create a unique visual style.
1. Change Clip Speed:
Right-click on the clip in the timeline and select "Speed and Duration." Adjust the speed slider to speed up or slow down the clip.
2. Create Slow Motion or Time-Lapse:
Use speed control to create slow-motion or time-lapse effects. Experiment with different speed settings to achieve the desired effect.
Exporting Your Video
Once you`ve finished editing your video, it`s time to export and share it with the world.
1. Export Settings:
Click on the "Export" button and choose the desired export format. Filmora offers a variety of formats suitable for different platforms (e.g., YouTube, Vimeo, MP4).
2. Adjust Export Settings:
Customize the export settings, such as resolution, frame rate, and bitrate, to ensure the best quality for your video.
3. Save and Share:
Click "Export" to save your video. You can also upload it directly to social media platforms or burn it to a DVD.
Congratulations! You`ve now mastered the basics of video editing with Wondershare’s Filmora. This powerful yet user-friendly software offers all the tools you need to create stunning videos. As you continue to explore and experiment with different techniques, you`ll discover even more ways to enhance your videos and bring your creative visi
Comment:
Your email address will not be published. Required fields are marked *
Related Posts
May 4, 2026
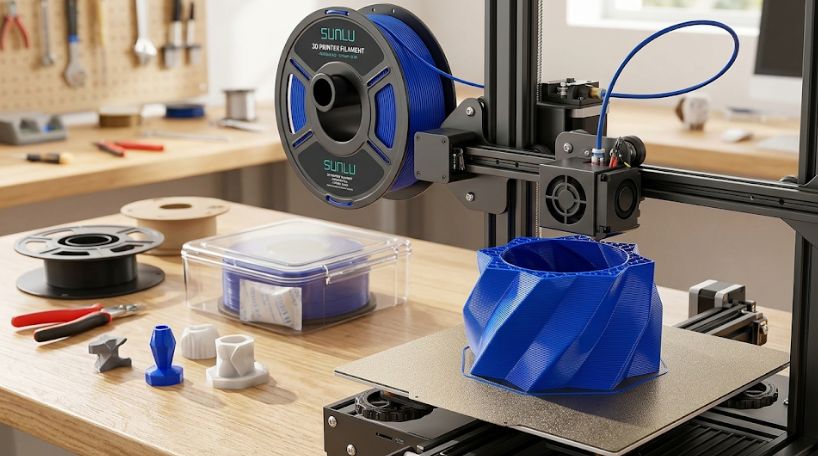
How to Get Better 3D Prints Without Wasting Filament
When you begin printing, you have big expectations... But halfway through, something is wrong.

Apr 30, 2026
How to Track Assets Efficiently Without Losing Control
It is possible to send the equipment, shipment or vehicles.

Apr 30, 2026
How to Keep Your Drinks Fresh and Convenient All Day
When you make your shake cold beverage, or coffee, only to realize it's too warm quickly, spilling out of the bag, or is difficult to carry around.